Hey there! Today, we’re going to talk all about oven self-cleaning functions. Cleaning an oven usually takes a lot of time and can get pretty messy. Luckily, lots of ovens these days have this cool feature that cleans itself, making our lives a whole lot easier. We’ll go through the perks of using this self-cleaning option, explain how it does its magic, and walk you through each step on how to use it right.
Our spotlight will be on Monogram ovens because they’re top-notch with their fancy features. But even if you don’t have one from GE Monogram but your oven has a self-cleaning button, stick around! This chat is for anyone curious about making their oven shine without breaking much sweat.
So let’s jump in and learn everything there is about oven self-cleaning functions – understanding what makes them tick to getting your oven ready for its cleaning cycle. By the time we wrap up here today,you’ll feel like a pro at hitting that self-clean button and having an oven that looks brand new.
Understanding Your GE Monogram Oven’s Self-Cleaning Feature
In your GE Monogram oven, there’s a cool feature that cleans itself by using really hot temperatures to get rid of leftover food bits and grease. When you start the cleaning cycle, this intense heat turns all that gunk into ash. After it’s done, you can just wipe it off easily. For safety and to make sure everything works right, the oven door locks while it’s cleaning itself. This whole process also gets rid of any bad smells and means you don’t have to scrub hard manually. Knowing how this works helps keep your appliance running well for longer.
What Is Self-Cleaning and How Does It Work?
Ovens now have a self-cleaning feature using high temperatures or steam to remove food bits and stains. The intense heat method reaches up to 800ºF, turning residue into ash. Steam cleaning uses less heat and water for easy removal of stubborn particles. The oven locks during cleaning for safety until it cools down. Smoke or odors during cleaning are normal and ventilation helps clear them quickly. Cleaning time ranges from 1.5 to 3 hours depending on the oven’s initial dirtiness.
Benefits of Using the Self-Cleaning Function
Using the self-cleaning feature in your oven saves time and energy by eliminating the need for manual scrubbing. High heat or steam cycles break down tough food residue and grease, leaving your oven floor spotless. This function also eliminates lingering odors, ensuring a fresh-smelling oven. Regular use of the self-cleaning feature improves oven performance by clearing built-up gunk and promoting even heat distribution for perfectly cooked meals.
Preparing Your Oven for Self-Cleaning
Before you start the self-cleaning cycle on your oven, it’s important to take a few steps to make sure everything goes smoothly and safely.
Safety Precautions Before Starting the Self-Cleaning Cycle
Before starting your oven’s self-cleaning cycle, prioritize safety. The oven gets extremely hot during the cleaning process, heating up surfaces like the door. Ensure children and pets stay away to prevent accidents. Check that the door is tightly closed and the gasket is intact to contain the heat effectively. Ventilate the kitchen by opening windows or using exhaust fans to clear out any smoke or odors. Following these safety steps ensures a smooth and safe cleaning process.
Step-by-Step Guide to Using the Self-Cleaning Function
Cleaning your oven with its self-cleaning feature is pretty easy. Here’s a simple guide to help you through the cleaning cycle:
Supplies Needed
Before you start the cleaning cycle, make sure to have a few things handy: a damp cloth, soapy water, vinegar, and a damp paper towel. With these items close by, you’ll be all set to clean up any leftovers inside your oven after it’s done with its self-cleaning process. For those stubborn spots that won’t go away easily? A mix of vinegar and water should do the trick just fine. Having these supplies ready from the get-go will help smooth out the whole cleaning phase and keep your oven looking spotless.
Step 1: Remove Loose Items and Quickly Wipe Down the Inside
Before you start the cleaning cycle, make sure to take out any items that aren’t attached inside your oven. This helps get it ready for a good clean. With a damp cloth, quickly go over the inside to pick up any bits and pieces left behind. Doing this first step is important because it gets rid of loose stuff that could mess with the cleaning process later on. Giving your oven a quick check before you kick off the self-cleaning can really help make sure everything goes smoothly and gets as clean as possible during those high temperatures. Always remember, starting off clean is key to getting great results from your oven’s self-cleaning feature.
Step 2: Run the Self-Clean Cycle
Once you’ve got the oven ready for its self-cleaning magic, it’s time to kick off the clean cycle. Here’s how to make sure everything goes smoothly:
- Start by closing the oven door tightly.
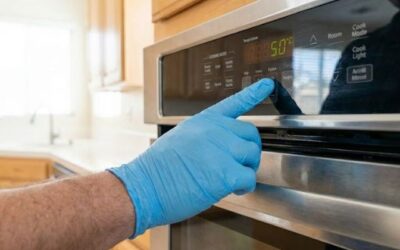
- Choose the self-clean option on your oven.
- Select the duration based on dirt.
- The oven will get extremely hot, over 800ºF, burning off food and grime into ash.
- The cleaning may take 1.5 to 3 hours, depending on residue amount.
- Allow the cycle to run without interruptions.
Step 3: Wait for the Cycle to Complete and Oven to Cool
After the cleaning cycle is done, it’s tempting to open the oven door right away. But for safety reasons, let it cool down slowly. The clean cycle cranks up the heat inside, making it really hot. So hang in there and wait until it cools off. This not only keeps you from getting burned but also makes any leftover food residue simpler to clean up later on. Before you move on to wiping out what’s left inside the oven, giving it time to cool is crucial.
Step 4: Wipe Out the Oven Cavity
Once the cleaning cycle is over, grab a damp cloth and give the inside of your oven a good wipe. It’s important to get rid of any leftover bits by gently scrubbing them away. Focus on areas like the oven door and around the gasket since that’s where grease and food residue love to hang out. If you come across some tough spots, try using a damp paper towel dipped in soapy water; it usually does the trick. Just make sure not to use anything too harsh that might scratch up your oven surfaces. After everything is clean, dry off your oven completely before firing it up again for cooking. This step makes sure your oven stays in tip-top shape for whipping up whatever dish comes next.
Differences Between Steam Clean and Self-Clean Functions
When it comes to cleaning your oven, there are two main ways to do it: steam cleaning and self-cleaning. With steam cleaning, you’re using lower temperatures and water to get rid of light dirt. It’s a gentler method that doesn’t leave behind any smells. On the other hand, self-cleaning cranks up the heat really high to tackle tough grease and stains but can make your kitchen smell because of those high temperatures. If you just need a quick tidy-up, go for steam cleaning. But if your oven is in serious need of attention due to lots of buildup or grease, then self-cleaning might be what you need. Knowing when to use each method can help keep your oven in top shape without too much fuss about leftover residue or unpleasant odors from the clean-up process.
When to Use Each Cleaning Function
For small messes, use steam clean to quickly get rid of minor grease and food bits. Regular use prevents dirt buildup as it requires less heat and shorter cycles. For tough grime, choose self-clean cycles to tackle baked-on residue effectively. Follow the oven maker’s guidelines for optimal cleaning without any hassle.
How to Extend the Life of Your Oven After Self-Cleaning
To keep your oven working well for a longer time, it’s important to clean it often and take good care of it.
- With the cleaning process done, use a damp paper towel or cloth to get rid of any ash or leftovers. It’s crucial to clear out all the extra grease or bits of food left after cleaning. This stops them from piling up and messing with how your oven works.
- Make sure you regularly check and tidy up the heating elements in your oven. When grease and bits from cooking gather on these parts, they don’t work as well and won’t last as long. A damp cloth or sponge dipped in soapy water is great for wiping away any buildup on these elements.
- It’s best not to use aluminum foil or liners inside your oven because they can mess with the cleaning cycle and harm the inside of your oven. Instead, putting a baking dish under whatever you’re cooking will catch anything that drips down.
By sticking to these upkeep tips like using soapy water for cleanup, avoiding aluminum foil, focusing on keeping heating elements clean with just a simple wipe from something like a damp cloth every now then ensures that everything about maintaining an optimal condition becomes second nature thus extending its lifespan significantly.
Conclusion
Wrapping things up, getting to know your oven self-cleaning functions, especially if it’s a GE Monogram, makes taking care of it much easier and helps it last longer. By sticking to safety rules and using it the right way, you can make sure your oven stays in great shape. Also, figuring out when to use steam clean instead of self-clean options will give you better cleaning outcomes. Don’t forget about doing some maintenance after cleaning to keep your oven working well for a long time. For more tips on fixing temperature issues, take a look at our blog post: Resolving GE Monogram Oven Temperature Problems Easily.
Frequently Asked Questions
How Often Should I Use the Self-Clean Function?
How often you should use the self-clean feature on your oven really depends on how much it’s used and how dirty it gets. It’s a good idea to clean it before there’s too much buildup, so you don’t end up with a lot of smoke and fumes when cleaning.
Can I Leave My House While the Oven Is Self-Cleaning?
Leaving the oven on self-cleaning mode can lead to smoke and smells, so it’s best to stay nearby. Ensure proper ventilation and relocate pets to another room for their safety.
Is It Safe to Clean the Oven Manually After Using the Self-Clean Function?
After the oven’s self-cleaning cycle, gently wipe away any remaining residue with a damp cloth or sponge and soapy water. Avoid harsh scrubbers and abrasive cleaners to protect the oven’s surface. Do not use aluminum foil or liners inside as they can interfere with the cleaning process.
What Should I Do If the Self-Clean Function Does Not Work as Expected?
If the self-clean feature isn’t working, try these steps: Ensure the oven door is closed and locked. Follow the manufacturer’s instructions for a clean cycle. If issues persist, contact the oven company or seek expert help. Avoid high heat scrubbing if self-clean isn’t effective.