A broken dishwasher can be a real problem, especially if the water inlet valve is not working right. This small part controls how water goes into your dishwasher. When it breaks, you might see issues like not enough water filling up or no water coming in at all. The good news is that dishwasher water inlet valve replacement is something most homeowners can do by themselves. This can help you save time and money.
Understanding the Dishwasher Water Inlet Valve
The water inlet valve is an important part found in many appliances that use water, like your Monogram dishwasher. It looks like a small, round device and is usually located near the bottom of the appliance, often behind a panel.
The inlet valve is key to how your dishwasher works. It controls the water flow from your home’s water supply line into the dishwasher. When you start a wash cycle, the control panel tells the inlet valve to open. This lets water flow into the tub. When the right water level is reached, the valve closes to stop any more water from coming in.
A working water inlet valve is necessary for good dishwashing. If it does not work, your dishwasher might not get enough water, which can leave your dishes dirty, or it may not fill with water at all.
Signs of a Faulty Water Inlet Valve
Detecting a bad water inlet valve early can help you avoid big problems later. Here are a few signs that show there may be an issue with this part:
One clear sign is if there isn’t enough or any water coming into your dishwasher. If your dishes are coming out dirtier than normal or the dishwasher tub is dry after a cycle, the inlet valve might be causing the problem.
You might also hear strange sounds during the water-filling cycle, like humming, buzzing, or vibrating. Water leaking from the dishwasher, especially at the bottom, is another sign. If you see any of these signs, you should check the water inlet valve and think about replacing it if needed.
Preparing for Replacement
Before you start replacing anything, make sure you have all the tools and materials you need. This will help everything go smoothly.
Also, it is very important to stay safe by turning off the power and water supply. This can help you avoid electrical shocks and floods by accident.
Tools and Materials Needed
Having the correct tools makes replacing the part easier. You will need: Water inlet valve, screwdrivers, pliers, towels, bucket. Get a valve suitable for your dishwasher model. Phillips and flathead screwdrivers may be necessary. Channel-lock or adjustable pliers can help. Keep towels nearby for spills. Position a bucket below connections to catch water drips. Having these tools will simplify the valve replacement process.
Safety Precautions
Before repairing your dishwasher, focus on safety. Start by shutting off the power and water supply. Turn off the circuit breaker supplying power. Locate and close the water shut-off valve, usually under the sink. Wear safety glasses and gloves for protection. Keep children and pets away from the work area.
Step-by-Step Guide to Replacing the Water Inlet Valve
Now that you have set up your workspace and collected the tools you need, it is time to follow the step-by-step guide to change your dishwasher water inlet valve.
By taking each step slowly and carefully, you will be able to do a good job with the replacement:
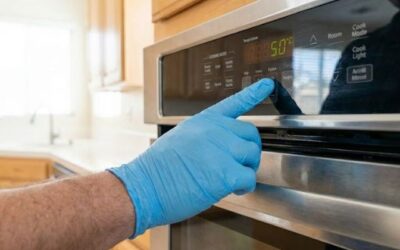
Step 1: Disconnect Power and Water Supply
Before you start working on your dishwasher, you need to turn off the power and water supply. This helps avoid electrical shock or flooding.
First, find the electrical panel in your home. Look for the circuit breaker that controls your dishwasher and switch it off. To be safe, try to run the dishwasher to make sure the power is really off.
Next, find the water shut-off valve for your dishwasher. This valve is usually located under the kitchen sink, close to the dishwasher’s water line. Turn the valve clockwise to stop the water from flowing to the appliance. By doing this, you will have a safe place to work.
Step 2: Access the Inlet Valve
To get to the water inlet valve, you have to take off the lower access panel or kick plate of the dishwasher. This panel is usually at the bottom of the front side of the dishwasher. It may be fixed with screws or clips, depending on your dishwasher model.
If there are screws, use a screwdriver to take them out. Remember to keep the screws safe so you can find them when you put everything back together. If there are clips, use a putty knife or flathead screwdriver to gently lift the clips and remove the access panel.
After you take off the panel, place it to the side. You should now see the inside of the dishwasher clearly, including the water inlet valve.
Step 3: Remove the Old Valve
With the water supply turned off, find the water inlet valve on your dishwasher. This valve is usually a small cylinder linked to the water line and electrical wires.
Use pliers to gently unscrew the nut that connects the water supply line to the valve. Keep a bucket or towel nearby to catch any water that may spill out. After you disconnect the water line, next remove the electrical connector from the valve. Depending on your model, you might need a screwdriver to loosen a clip or press a tab to release the connector.
Now that both the water line and the electrical connector are off, you can take out the screws holding the valve to the dishwasher. Carefully unscrew them while supporting the valve to avoid it falling into the dishwasher.
Step 4: Install the New Valve
Take your new water inlet valve and place it where the old one was. Make sure it is lined up correctly before you secure it with the mounting screws you took off earlier.
Next, attach the electrical connector to the new valve. Ensure it snaps into place firmly. If there was a retaining clip, put it back on. After that, reconnect the water supply line to the valve’s inlet port. Use pliers to tighten the nut, so it is snug and won’t leak. Be careful not to overtighten, as it might damage the valve or the water supply line.
Finally, check that all connections are secure. This includes the electrical connector and the water supply line. Then you can move on to the next step.
Step 5: Reassemble and Test
Before you turn on the water and power, you need to put your dishwasher back together and look for leaks. Carefully put back the access panel or kick plate you took off earlier. Use the screws or clips you saved and make sure the panel is in the right place.
After the dishwasher is fully put together, turn on the water supply under your sink at the shut-off valve. Check closely for any leaks around the water inlet valve and its connections. Then, switch on the circuit breaker in the electrical panel to bring power back to your dishwasher.
Finally, run a short test cycle on your dishwasher. This will help you see if the new inlet valve is working and if there are any leaks. Listen for any strange noises during the water-filling part of the cycle. Also, make sure the dishwasher fills with water like it should.
Conclusion
To keep your dishwasher working well, it’s important to understand and take care of the water inlet valve. Use the step-by-step guide and safety tips provided here on dishwasher water inlet valve replacement. Regularly checking the water inlet valve can help you avoid problems in the future. If you need expert help or extra support, you can contact GE Monogram Inc Repair. Stay informed and be active about your dishwasher’s maintenance to keep it in great shape.
Want more DIY tips? Check out our blog on Fixing Dishwasher Not Cleaning Properly and learn more about troubleshooting common dishwasher issues.
Frequently Asked Questions
How do I know if the water inlet valve needs replacement?
If your dishwasher does not fill with water, makes strange sounds while filling, or leaks from the bottom, you may need to replace the inlet valve.
What are the common mistakes to avoid while replacing the valve?
Common mistakes are overtightening connections, forgetting to turn off the power and water, and putting in a valve that does not match.
How often should the water inlet valve be inspected?
It’s not something you do often, but it’s smart to check the inlet valve once a year. Look for any signs of wear, damage, or mineral buildup on the valve.
Can a faulty water inlet valve cause other issues with the dishwasher?
Yes, a faulty water inlet valve in a dishwasher can lead to issues like low water pressure, dishes not being cleaned properly, or even leaks. If the valve is not functioning correctly, it can disrupt the flow of water into the dishwasher, affecting its overall performance.