Your GE Profile oven door is a crucial component of your kitchen appliance, ensuring safety and optimal functionality. Understanding its anatomy and knowing the signs for GE Profile oven door replacement are key. By preparing adequately and following a step-by-step guide, you can efficiently replace the oven door of your GE Appliance. Learning to troubleshoot common issues and maintain the new door will enhance your oven’s performance. Whether opting for a DIY approach or seeking professional help, a well-maintained oven door is essential for safety and efficiency.
Understanding Your GE Profile Oven Door
The GE Profile oven door is a crucial component of your appliance. Comprised of the oven door glass and intricate hinge system, it serves a vital role in maintaining the oven’s functionality. Understanding the anatomy of the oven door is essential to recognize signs that may indicate the need for a replacement. Issues like a malfunctioning hinge or damaged glass not only impact performance but also pose a risk of fire due to compromised seals or faulty electrical components. Prepare for success by grasping the intricacies of your GE oven door.
Signs You Need a Door Replacement
If you notice cracks in the oven door glass or irregularities in the hinge function, it may be time for a GE profile oven door replacement. An ill-fitting door that compromises the seal can pose a risk of fire or impact the oven’s functionality. Keep an eye out for any visible damage to the electrical components within the door, as this can also signal the need for a replacement. Regular maintenance and prompt action can prevent further issues.
Preparing for Oven Door Replacement
Before attempting to perform DIY GE Profile oven door replacement, there are a few crucial steps to take.
Tools and Materials Needed
To successfully replace your GE Profile oven door, gather these tools and materials: a screwdriver, gloves, a soft cloth, replacement hinges if necessary, and the new oven door. Safety goggles for protection against any glass breakage are also recommended. Ensure that you have adequate lighting and space to work comfortably.
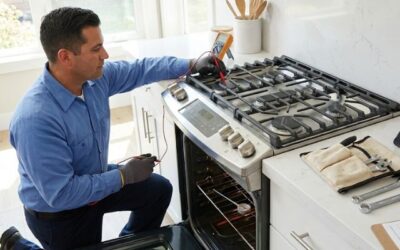
Safety Precautions Before Starting
Before beginning the GE Profile oven door replacement process, it’s crucial to prioritize safety. Ensure the appliance is disconnected from the power source to avoid risks associated with electrical components. Protect yourself by wearing gloves to prevent injuries from sharp edges or hot surfaces. Carefully handle the oven door glass to avoid breakage and potential harm. Understanding the risks involved and taking necessary precautions will help execute the replacement smoothly and safely.
Step-by-Step Guide to Replacing Your Oven Door
Now you know the signs you need oven door replacement, tools and materials needed, and safety precautions before attempting to replace your oven’s door, let’s proceed to the step-by-step process.
1. Removing the Old Oven Door
To begin the process of replacing your GE Profile oven door, the first step is removing the old oven door. Start by opening the door partially to access the hinges. Locate the hinge locks on each side of the door and flip them down. Slowly lift the door upwards until it detaches from the hinges. Carefully place the door on a flat, secure surface to prevent any damage to the oven door glass or other components.
2. Preparing the New Door for Installation
Before installing the new GE Profile oven door, ensure the oven is turned off and cool. Carefully unpack the new door, making sure not to damage any electrical components or the oven door glass. Verify that the hinge is in the correct position for installation, aligning it properly with the oven frame. This step is crucial to guarantee the smooth functioning and longevity of your oven door. Take your time to prepare the new door adequately before proceeding with the installation process.
3. Attaching the New Door to the Oven
To attach the new oven door, ensure the hinges are aligned correctly with the slots on the oven. Slide the hinges into place until you hear a click, indicating they are securely attached. Test the door to confirm smooth functionality by opening and closing it gently. Make sure the door seals properly to avoid any heat loss during baking. Finally, double-check that the electrical components, if any, are properly connected and secure before fully closing the door.
Troubleshooting Common Oven Door Replacement Issues
If your oven door doesn’t fit properly after replacement, check the alignment of the hinges. Misaligned hinges can cause issues with closing and sealing. Adjust them carefully to ensure a proper fit. If the door doesn’t close or seal correctly, the oven’s functionality and energy efficiency may be compromised. Ensure that the oven door gasket is in good condition and properly seated to prevent heat loss. Regular maintenance can prevent these common issues and extend the lifespan of your GE Profile oven door.
Maintaining Your New GE Profile Oven Door
Maintaining your new GE Profile oven door is crucial for its longevity and optimal performance. By following a few simple cleaning and care tips, you can keep your oven door looking pristine and ensure its functionality.
Cleaning and Care Tips
To clean the oven door glass, start by removing any loose debris or food particles using a soft cloth or sponge. Then, create a cleaning solution by mixing mild dish soap with warm water. Dip the cloth or sponge into the solution and gently scrub the glass, paying extra attention to any stubborn stains. Rinse the glass with clean water and dry it thoroughly using a lint-free cloth.
In addition to regular cleaning, it’s important to avoid using abrasive cleaners or scrub brushes, as they can scratch the glass surface. Also, be cautious when using oven cleaners near the door, as the harsh chemicals can damage the glass.
Preventive Measures to Extend Door Lifespan
Taking preventive measures can help extend the lifespan of your GE Profile oven door. Regularly inspect the electrical components, such as the door switch and light bulb, to ensure they are functioning properly. Replace any faulty components promptly to prevent further damage.
Inspect the hinges of the oven door for any signs of wear or looseness. Tighten any loose screws and lubricate the hinges as recommended by the manufacturer. This will ensure smooth operation and prevent the door from sagging or misaligning.
Furthermore, avoid slamming the oven door or placing excessive weight on it, as this can strain the hinges and compromise the overall functionality of the door. By following these preventive measures, you can maintain the integrity of your oven door and minimize the risk of fire hazards.
Conclusion
Maintaining your GE Profile oven door is crucial for optimal performance. By following safety precautions and a step-by-step guide for the GE Profile oven door replacement process, you can ensure a seamless upgrade. Troubleshoot any fitting issues post-installation for longevity. Regular cleaning and care will extend its lifespan and enhance energy efficiency. Consider if DIY or professional assistance from us here at GE Monogram Inc Repair is needed based on complexity. Keep these tips handy for a hassle-free experience and improved cooking consistency. For more DIY oven repair tips, check our comprehensive blog: Solving GE Profile Wall Oven Door Seal Leaks: Common Fixes.
Frequently Asked Questions
Can I replace my GE Profile oven door myself?
Yes, you can replace your GE Profile oven door yourself if you have the necessary DIY skills and experience. GE provides detailed instructions and resources for DIY door replacement. However, if you’re uncertain about your abilities or concerned about the risk of fire hazards or electrical components, it’s best to consult a professional technician.
How do I ensure the replacement door is compatible with my oven model?
To ensure compatibility, it’s important to purchase the replacement door specifically designed for your GE Profile oven model. You can find the correct replacement door by referring to the model number of your oven. GE’s website and customer support can assist you in finding the right door for your specific model.
What should I do if the new door doesn’t seal properly?
If the new door doesn’t seal properly, it’s important to address the issue promptly to prevent heat loss and potential safety hazards. Check the alignment of the door and ensure all hinges and seals are properly installed. If you’re unable to resolve the issue, consult a professional technician to assess and fix the seal.
Are there specific tools required for oven door replacement?
The specific tools required for oven door replacement may vary depending on the model and manufacturer. However, common tools typically include a screwdriver, pliers, and potentially a socket wrench. Always refer to the manufacturer’s instructions and recommended tools before attempting any DIY door replacement.
How often should I replace my oven door?
The frequency of replacing your oven door depends on various factors, including usage, maintenance, and overall condition. If you notice any signs of wear, damage, or decreased functionality, it may be time to consider replacing the door. Regular inspections and preventive maintenance can help prolong the lifespan of your oven door.