A broken burner valve can make cooking a frustrating task. If you notice flames that are not even, trouble lighting the burners, or no gas flowing at all, the burner valve might be the problem. The good news is that many homeowners can fix this issue on their own. This guide will take you step-by-step on how to replace a cooktop burner valve. It will help you bring your appliance back to life so you can get back to making great meals.
Understanding the Basics of a Cooktop Burner Valve
Before we start the replacement, we should understand how important burner valves are for your cooktop. The burner valve controls the gas flow to the burner. When you turn the control knob, it works with the valve. This allows a specific amount of gas to flow through. This controlled gas flow creates steady flames. It also lets you change the heat level based on what you are cooking.
Over time, burner valves can wear out or get clogged with food bits or grease. When this happens, the valve may not open or close correctly. This can lead to problems with the burner.
Signs Your Cooktop Burner Valve Needs Replacement
Identifying a faulty burner valve is the first step in a successful repair. Watch for these signs indicating your cooktop burner valve needs attention. Weak flames or ignition issues signal a potential problem with the valve. A gas smell when burners are off could indicate a gas leak, requiring immediate action. If you hear clicking noises while trying to light the burner, there may be internal issues that necessitate a replacement.
Preparing for the Replacement Process
Before you start replacing anything, make sure to gather all the needed tools. It’s also important to create a safe workspace. Having everything ready will make the job easier and cut down on interruptions.
Essential Tools and Materials Needed
To replace a cooktop burner valve smoothly, you need the right tools and materials. Here’s a checklist to ensure readiness: First, get a new burner valve that fits your GE cooktop model. Check the manual or manufacturer’s website for the correct part number. Next, gather basic hand tools such as a Phillips screwdriver, flat-head screwdriver, wrenches (sizes may vary based on your cooktop model), and pliers. Remember to wear work gloves for hand protection against sharp edges and heat. Also, wear safety glasses to shield your eyes from debris.
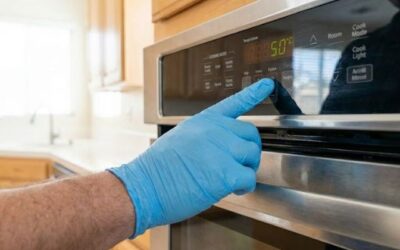
Safety Precautions Before Starting
Safety is crucial when using appliances, particularly with gas or electricity. Some essential safety tips are:
- Unplug the cooktop and disconnect from the gas line.
- Work in a ventilated area to prevent gas build-up.
- Keep a fire extinguisher nearby for unexpected fires.
Step-by-Step Guide to Replacing a Cooktop Burner Valve
Now that you have your tools and safety measures ready, you can start replacing your cooktop burner valve. Make sure to check your cooktop’s user manual for special instructions for your model.
Follow these steps carefully to ensure that the replacement goes well:
Step 1: Disconnecting the Cooktop
- Clear the Area: Remove items around your cooktop to create space. Take away obstacles, cookware, and appliances.
- Disconnect from Power Source: Unplug your cooktop from the electrical outlet. If hardwired, turn off the correct circuit breaker.
- Shut Off Gas Supply: For gas cooktops, locate the gas shut-off valve. Turn it clockwise to stop gas supply completely.
Step 2: Removing the Cooktop Surface
With the power and gas off, start by removing the cooktop surface to reach the burner valves.
- First, take off grates, burner caps, and other parts.
- Find and unscrew or unclip the fasteners holding the top panel.
- Lift off the top panel with caution.
- For freestanding stoves, lift up then back; for slide-in, slide forward or lift from front after loosening clips.
Continuing the Replacement Process
Now that you have taken off the cooktop surface, you can see the internal parts, like the burner valves. Be sure to be careful, since these parts can be fragile.
Next, look for the broken burner valve. Remember, burner valves are often found below the cooktop surface and are attached to the control knobs.
Step 3: Accessing the Burner Valve
- Find the broken valve: Each burner has a valve. Identify the faulty valve.
- Remove wires and tubes: Disconnect all connected wires and tubing carefully. These can include igniter wire, thermocouple, or gas tube.
- Loosen the bracket: Find and loosen the bracket holding the valve using a wrench or pliers.
Step 4: Removing the Old Valve
- Remove the Valve: After detaching the bracket, the old valve will loosen. Gently take it off. Some units may have a clip or tab securing it.
- Check for Issues: Examine the valve for damage, such as cracks or rust. Check for dirt or clogs affecting function. Significant damage or blockages indicate replacement.
- Dispose Properly: Follow local regulations when discarding the old burner valve.
Finalizing the Valve Replacement
Now that you have taken out the old burner valve, it’s time to put in the new one. Make sure to line up the new valve correctly and fasten it securely. Check that all connections are in place.
Before you start the reassembly, double-check everything to avoid any leaks or problems.
Step 5: Installing the New Burner Valve
- Place the new valve by aligning it with the cooktop opening.
- Gently push it in until flat.
- Reattach the mounting bracket securely but avoid over-tightening to prevent damage.
- Reconnect wires and tubing ensuring all connections are secure to avoid leaks.
Step 6: Reassembling the Cooktop
- Position the top panel back on the base carefully.
- Ensure burner holes and knobs align properly.
- Put and tighten all fasteners securely to hold the top panel.
- Refer to the manual for guidance.
- Reconnect power by plugging in or switching on the circuit breaker. For a gas cooktop, turn on the gas valve.
Contact GE Monogram Inc Repair for Reliable Service!
Replacing a cooktop burner valve can be done by many homeowners. However, some cases may need a professional. If the repair is complicated, you don’t have time for a DIY project, or if you want the confidence of a pro’s help, GE Monogram Inc Repair is ready for you! Our skilled and certified appliance repair team knows all about GE appliances. We provide high-quality service and expertise. Contact us now for reliable and quick appliance repair solutions. You can trust GE Monogram Inc Repair to take care of your appliance needs. This will give you peace of mind and keep your valuable appliances running smoothly.
Conclusion
In conclusion, changing a cooktop burner valve is an easy project that you can do yourself if you have the right tools and are careful. By sticking to the step-by-step guide on how to replace a cooktop burner valve, you can replace the valve safely and successfully. Always remember to prioritize safety and unplug the cooktop before you start. If you run into any problems or want professional help, you can contact GE Monogram Inc Repair for dependable service. For more DIY tips and ideas on home maintenance, visit our blog on How to Easily Fix a Cooktop Burner Not Turning Off Issue. Happy repairing!
Frequently Asked Questions
Can I replace a burner valve without professional help?
Replacing a burner valve is usually a repair that you can do yourself. If you follow the steps in this guide and keep safety in mind, most homeowners can handle the replacement on their own.
How do I know which burner valve to buy?
Check your GE cooktop’s user manual or find the model number sticker on the cooktop. With this information, you can search online or go to a GE appliance parts store. This will help you find the right burner valve replacement for your model.
What maintenance tips can prolong the life of my new burner valve?
Make sure to clean your cooktop surface often. This helps stop food particles and grease from blocking the burner valves. Wipe down the cooktop after you cook. You should also clean the burner areas more thoroughly from time to time.